Inviting your first students
Three ways to get students into your space: email invitation, an account you create with a PIN, or a shareable join link.
For teachers, school owners and admins. Everything here lives on the Students page.
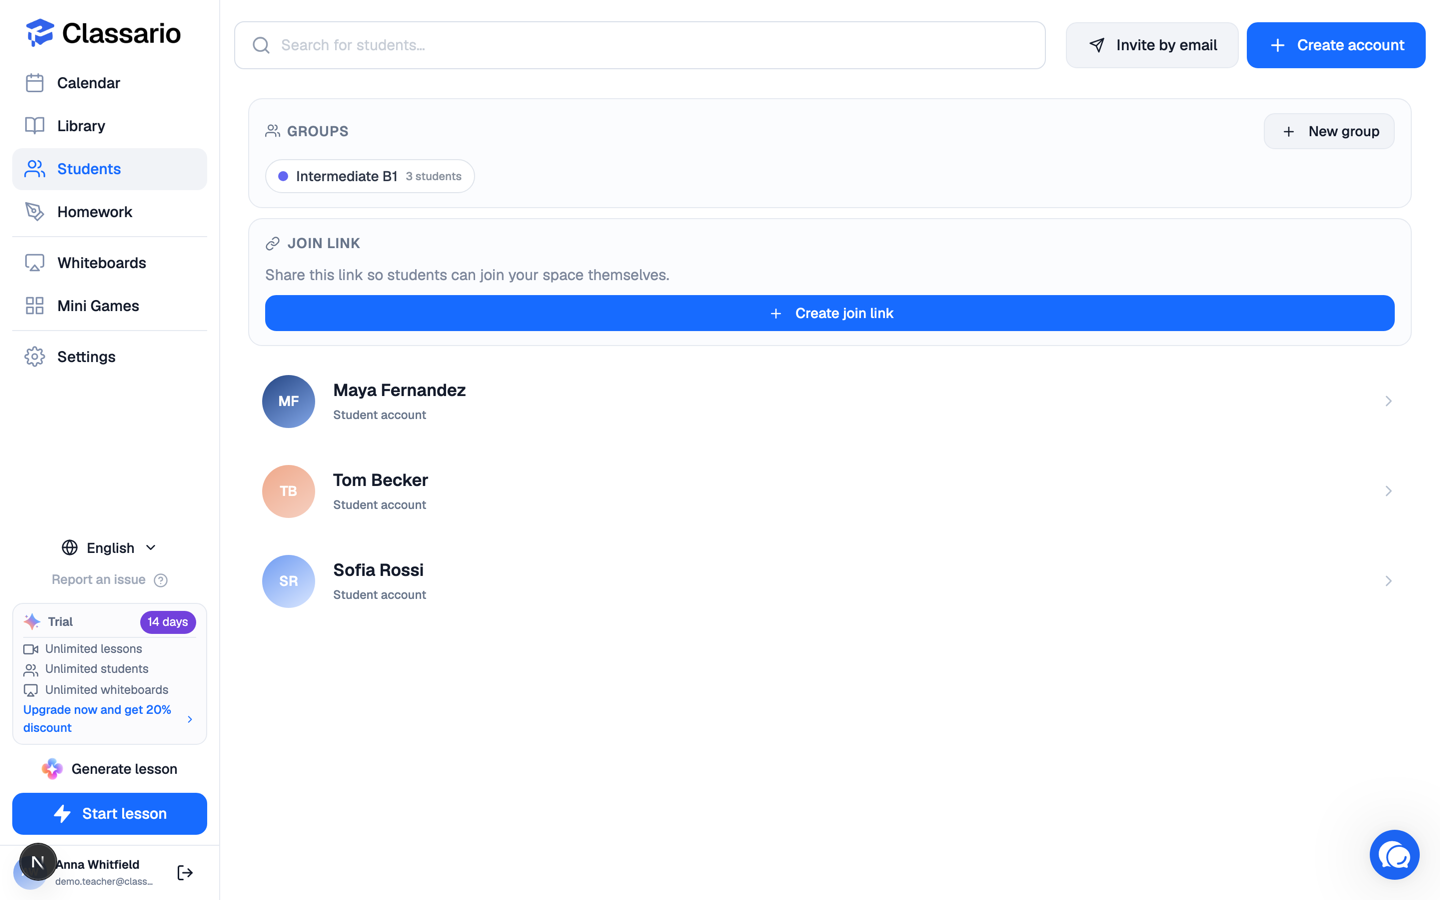
1. Invite by email
- Press Invite by email.
- Type the student's address and press Send invitation.
They get a single-use link. They can sign up or log in first — but the invitation must be accepted with the address it was sent to. Pending invitations are listed under Pending invitations, where you can Resend (which kills the old link) or Cancel them. Invitations expire; resending issues a fresh link.
If the address already belongs to a Classario account, it is connected to your space straight away and Classario tells you so — there is nothing for them to accept.
2. Create the account yourself
Best for students with no email, or when you want them teaching-ready in seconds.
- Press Create account.
- Enter the Student name and, optionally, their timezone so lessons show correctly before their first sign-in.
- Under Login, choose Username (e.g.
alex2026) or Email. - Press Create account. Classario shows the login and a 6-digit PIN — copy both and give them to your student.
You can look the PIN up again later from the student's card with Show login & PIN, or issue a new one with Reset PIN (the old one stops working immediately).
3. Share a join link
The Join link at the top of the Students page lets anyone who opens it join your space as a student. Handy for a whole class. You can rotate or disable it at any time — treat it as unlisted, not secret.
Removing someone
Open the student and press Remove student. They lose access to the space. Only owners and admins can remove members. If a student closed their own account, only they can reopen it.
Related
- Creating your account
- Managing your students
- Student groups